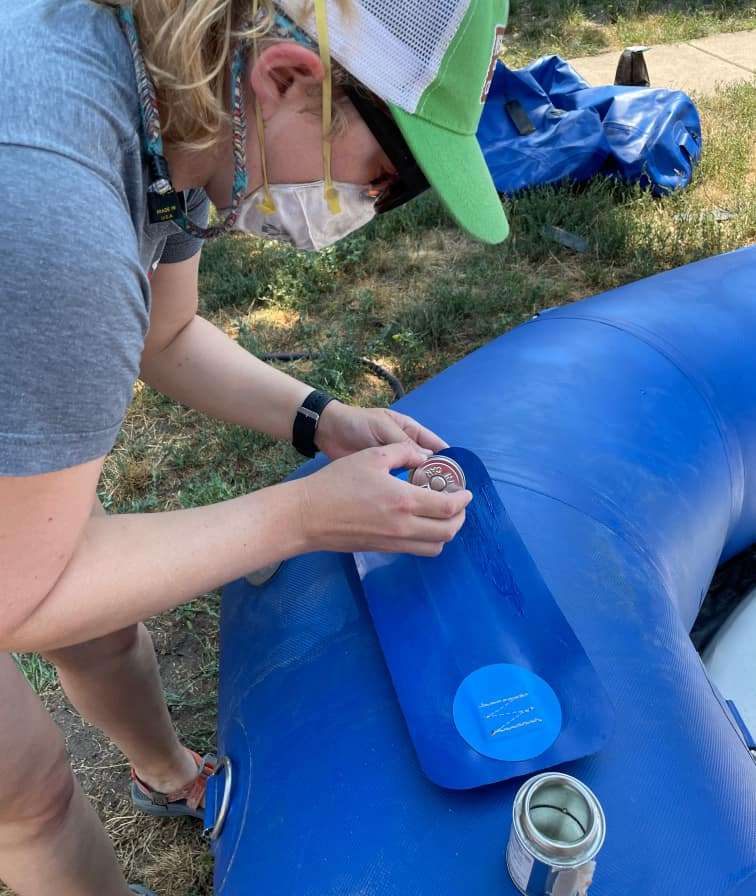
Ensuring your river raft remains seaworthy during your adventures is paramount, and a reliable river raft patch kit is the key to maintaining its integrity. Unexpected encounters with rocks, branches, or other submerged debris can lead to punctures and tears, potentially jeopardizing your trip. Having the right tools and knowledge readily available allows for quick and effective repairs, keeping you and your fellow rafters safe and enjoying the journey. This guide will delve into the essentials of a comprehensive river raft patch kit, offering insights into choosing the right components and mastering repair techniques.
Understanding the Components of a River Raft Patch Kit
A well-stocked river raft patch kit should include several key items to address a variety of repair needs. Here’s a breakdown of the essential components:
- Patch Material: This is the core of your kit. Look for durable, waterproof material that matches the type of material your raft is made of (e.g., PVC, Hypalon). Different sizes and shapes are beneficial.
- Adhesive: A strong, flexible adhesive specifically designed for inflatable repairs is crucial. Two-part adhesives often offer superior bonding strength, but single-part adhesives are more convenient for quick fixes.
- Applicator: Brushes, rollers, or syringes can help apply the adhesive evenly and precisely.
- Cleaning Supplies: Surface preparation is key for a successful patch. Include rubbing alcohol or a specialized cleaner to remove dirt, oils, and debris from the damaged area.
- Scissors or Knife: For cutting the patch material to the appropriate size and shape.
- Sandpaper or Abrasion Pad: To roughen the surface of both the raft and the patch for better adhesion.
- Pressure Roller or Weight: To apply even pressure to the patch while the adhesive cures.
- Valve Wrench: For tightening or replacing valves that may be leaking.
- Seam Sealer: For repairing small leaks along seams.
- Instructions: A detailed guide on how to use the kit components effectively.
Choosing the Right Patch Kit for Your Raft
Selecting the appropriate river raft patch kit hinges on the type of material your raft is constructed from. PVC rafts require PVC-specific patches and adhesives, while Hypalon rafts necessitate Hypalon-compatible materials. Using the wrong adhesive can result in a weak bond or even damage to the raft material.
Key Considerations When Choosing a Kit:
- Material Compatibility: Ensure the kit is designed for your raft’s material (PVC, Hypalon, etc.).
- Adhesive Type: Consider the pros and cons of one-part vs. two-part adhesives. Two-part adhesives offer stronger bonds but require mixing.
- Kit Size: Choose a kit with enough materials to handle multiple repairs, but avoid unnecessary bulk.
- Durability: Opt for high-quality materials that can withstand the rigors of river rafting.
- User Reviews: Read reviews from other rafters to gauge the kit’s performance and reliability.
Performing On-the-Water Repairs: A Step-by-Step Guide
Repairing a punctured river raft on the water requires a calm demeanor and a methodical approach. Here’s a basic guide:
- Deflate the Raft: Fully deflate the affected area to allow for proper adhesion.
- Clean the Area: Thoroughly clean the damaged area and the surrounding surface with rubbing alcohol or a specialized cleaner.
- Prepare the Patch: Cut a patch that is larger than the damaged area, with rounded corners to prevent peeling.
- Apply Adhesive: Apply adhesive evenly to both the patch and the prepared area on the raft. Follow the adhesive manufacturer’s instructions for drying time.
- Apply the Patch: Carefully position the patch over the damaged area and press firmly.
- Apply Pressure: Use a pressure roller or weight to apply even pressure to the patch for the recommended curing time.
- Inflate the Raft: Once the adhesive has fully cured, slowly inflate the raft and check for leaks.
Preventative Measures to Minimize Damage
While a reliable patch kit is essential, taking preventative measures can significantly reduce the likelihood of punctures and tears. Before each trip, thoroughly inspect your raft for any signs of wear and tear, such as abrasions, cracks, or weak seams. Avoid dragging your raft across rough surfaces and be mindful of submerged obstacles. Proper storage is also crucial; store your raft in a cool, dry place away from direct sunlight and sharp objects. These simple precautions will help extend the life of your raft and minimize the need for on-the-water repairs.
Ultimately, owning a quality river raft patch kit and understanding how to use it is vital for any river rafting enthusiast. The ability to quickly repair punctures and tears on the water can prevent minor inconveniences from turning into major setbacks. By investing in a well-equipped kit and practicing your repair skills, you can ensure a safer and more enjoyable experience on the river. Having your ‘river raft patch kit‘ close to you will make you feel safe.


