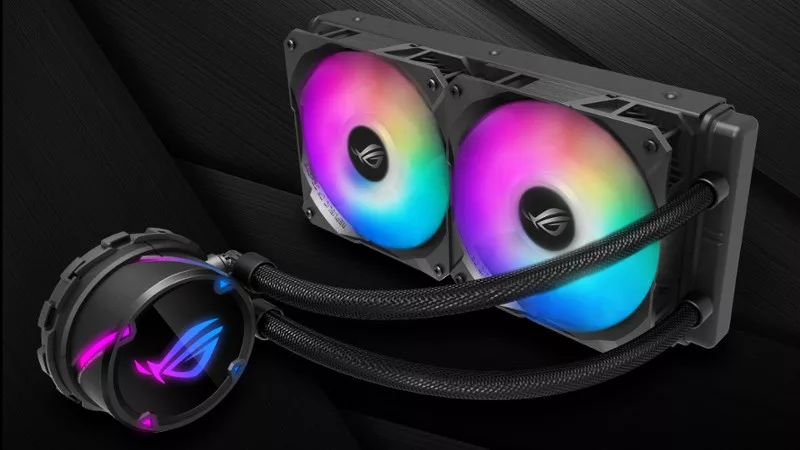
Keeping it Pure, be quiet! Pure Loop Series, Up to 360 mm AIOs
Selecting the perfect all-in-one (AIO) liquid cooler is crucial for optimal system performance and longevity. Carefully consider your CPU’s thermal design power (TDP) and the available space within your PC case. Match the radiator size accordingly; larger radiators generally offer better cooling capabilities. Remember to check compatibility with your motherboard and CPU socket type before purchasing.
Understanding Your CPU’s TDP
The Thermal Design Power (TDP) rating of your CPU is a crucial factor in selecting the right AIO cooler. TDP represents the maximum amount of heat a processor generates under typical operating conditions. It’s measured in watts (W) and is a key indicator of the cooling capacity required. A higher TDP necessitates a more powerful cooling solution. Before purchasing an AIO, meticulously check your CPU’s TDP specification. This information is usually found in the processor’s specifications sheet, on the manufacturer’s website, or within system information tools. Don’t solely rely on the clock speed; a higher clock speed doesn’t always translate to a higher TDP. Different architectural designs and manufacturing processes significantly impact heat output. For instance, a high-clocked CPU with efficient architecture might have a lower TDP than a lower-clocked CPU with less efficient architecture. Carefully review the TDP to ensure your chosen AIO cooler can effectively manage the heat generated by your processor, preventing thermal throttling which can negatively impact performance and potentially damage your CPU. Overlooking this critical aspect could lead to overheating, system instability, and potential hardware failure. Always choose an AIO with a cooling capacity exceeding your CPU’s TDP for optimal thermal headroom and sustained performance, especially under heavy loads like gaming or intensive workloads. Consider future upgrades; if you plan to upgrade to a higher TDP CPU in the future, select an AIO with sufficient cooling capacity to accommodate the upgrade without requiring another cooler purchase.
Matching Radiator Size to Your Case
The radiator size is a critical factor when choosing an AIO cooler. Available sizes typically range from 120mm to 360mm, referring to the total width of the radiator. Larger radiators generally offer superior cooling performance due to their increased surface area for heat dissipation. However, they also require more space within your computer case. Before purchasing, meticulously measure the internal dimensions of your case, paying close attention to the available space for radiator mounting. Check for compatibility with your motherboard’s mounting points and ensure sufficient clearance for fans. A 360mm radiator, while offering excellent cooling, might not fit in smaller form-factor cases. Conversely, a smaller 120mm or 240mm radiator might be sufficient for lower TDP CPUs but may struggle with high-heat-generating processors, potentially leading to thermal throttling. Consider the airflow within your case. A well-ventilated case will maximize the effectiveness of any radiator size. Poor airflow can significantly reduce cooling performance regardless of radiator size. If you have limited case space, consider a slimmer radiator design or a different cooling solution altogether. Remember that the radiator’s size is only one aspect of cooling performance; fan quality and pump efficiency also play significant roles. Carefully review the specifications of your chosen AIO cooler to ensure it’s compatible with your case and offers the cooling performance needed for your CPU.
Considering Pump Type and Noise Levels
The pump is the heart of your AIO cooler, responsible for circulating the coolant. While most AIOs utilize a centrifugal pump, understanding its characteristics is crucial. A high-quality pump ensures efficient heat transfer, contributing to lower operating temperatures and quieter operation. Pay close attention to the manufacturer’s specifications regarding pump noise levels, often measured in decibels (dB). Lower dB ratings indicate quieter operation. Consider the location of the pump within the AIO unit; some designs place the pump directly on the CPU block, while others have a separate pump unit. The pump’s location can affect noise levels and overall performance. A pump located directly on the CPU block often provides more efficient heat transfer. However, it might also contribute slightly more noise. Assess your tolerance for fan noise; some users are more sensitive to noise than others. If quiet operation is a priority, look for AIO coolers with low-noise certifications or those specifically designed for quiet performance. Consider the fan curve settings; most AIO coolers allow you to adjust the fan speed, providing a balance between cooling performance and noise levels. Remember that even the quietest pumps can become audible under heavy load, so consider your system’s typical usage patterns. Some AIO coolers offer advanced features like PWM fan control for fine-tuning noise and cooling performance. Read reviews and compare specifications from different manufacturers to find an AIO cooler that strikes the right balance between cooling effectiveness and noise levels to meet your specific needs and preferences.
Evaluating Connectivity and Features
Beyond basic cooling capabilities, consider the connectivity options and additional features offered by the be quiet! Pure Loop series AIO coolers. Examine the type of fan connectors; some models utilize standard 3-pin or 4-pin PWM connectors, offering different levels of fan speed control. PWM (Pulse Width Modulation) connectors provide more precise fan speed adjustments, allowing for better noise and cooling optimization based on CPU temperature. Check for compatibility with your motherboard’s fan headers; ensure you have enough available headers to connect all the fans included with the AIO cooler. Consider the length of the tubing; sufficient tubing length ensures easy installation and routing within your case, avoiding strain on the components. Some AIO coolers offer RGB lighting features, allowing for customization and integration with other RGB components in your system. If RGB lighting is important to you, verify the compatibility with your preferred RGB software and ecosystem. Assess the software control options; some manufacturers provide software to monitor coolant temperatures, adjust fan curves, and customize RGB lighting effects. Check for software compatibility with your operating system. Look for features that enhance installation and maintenance, such as easy-to-remove mounting brackets or quick-disconnect fittings. Evaluate the warranty provided by the manufacturer; a longer warranty period indicates greater confidence in the product’s reliability and durability. Consider the overall aesthetics; the AIO cooler’s design should complement your system’s build and personal preferences. Don’t just focus on the technical specifications; examine the product images and reviews to ensure it fits your style. Before making your final decision, compare the connectivity options, features, and overall value provided by different AIO coolers to select the best option that aligns with your needs and budget.
Installation and Compatibility Check
Before commencing installation, meticulously verify compatibility with your specific CPU socket type and motherboard. Consult the be quiet! Pure Loop series manual and the motherboard specifications to confirm compatibility. Improper installation can lead to damage to your components. Carefully review the installation guide provided with your AIO cooler; it contains detailed instructions and diagrams for each step. Take your time and follow each step precisely. If you are unfamiliar with PC component installation, consider seeking assistance from an experienced technician. Prepare your workspace by ensuring a clean and well-lit area. Have all necessary tools readily available, including screwdrivers and potentially thermal paste (check if pre-applied). Ground yourself to prevent static electricity damage to sensitive components. During the mounting process, ensure the cooler is securely fastened to the CPU, avoiding any misalignment or pressure imbalances. Pay close attention to the orientation of the mounting bracket and ensure it’s correctly aligned with the CPU socket. After mounting the cooler, carefully connect the tubing and fans, ensuring no kinks or obstructions are present. Route the tubing neatly within the case, avoiding close proximity to other components to prevent accidental damage. Once the installation is complete, carefully power on your system and monitor temperatures using system monitoring software. Check for any unusual noises or leaks. If any issues arise, immediately power down your system and troubleshoot the problem. Refer to the be quiet! Pure Loop series troubleshooting guide or contact their support for assistance. Regularly monitor the coolant temperature and fan performance to ensure optimal cooling. Proper installation and ongoing monitoring are essential to maximizing the lifespan and performance of your be quiet! Pure Loop AIO cooler. Remember, a correctly installed AIO cooler is crucial for maintaining optimal CPU temperatures and system stability.


